Servo ansteuern (Arduino, ESP8266, ESP32) arduinoprojekte.info
Servomotoren mit dem Arduino ansteuern | Arduino Tutorial Elektroschrott - Arduino & Co. 643 subscribers Subscribe 6K views 3 years ago Arduino Tutorials Heute erkläre ich euch, was ein.

Nr.13 Servo ansteuern
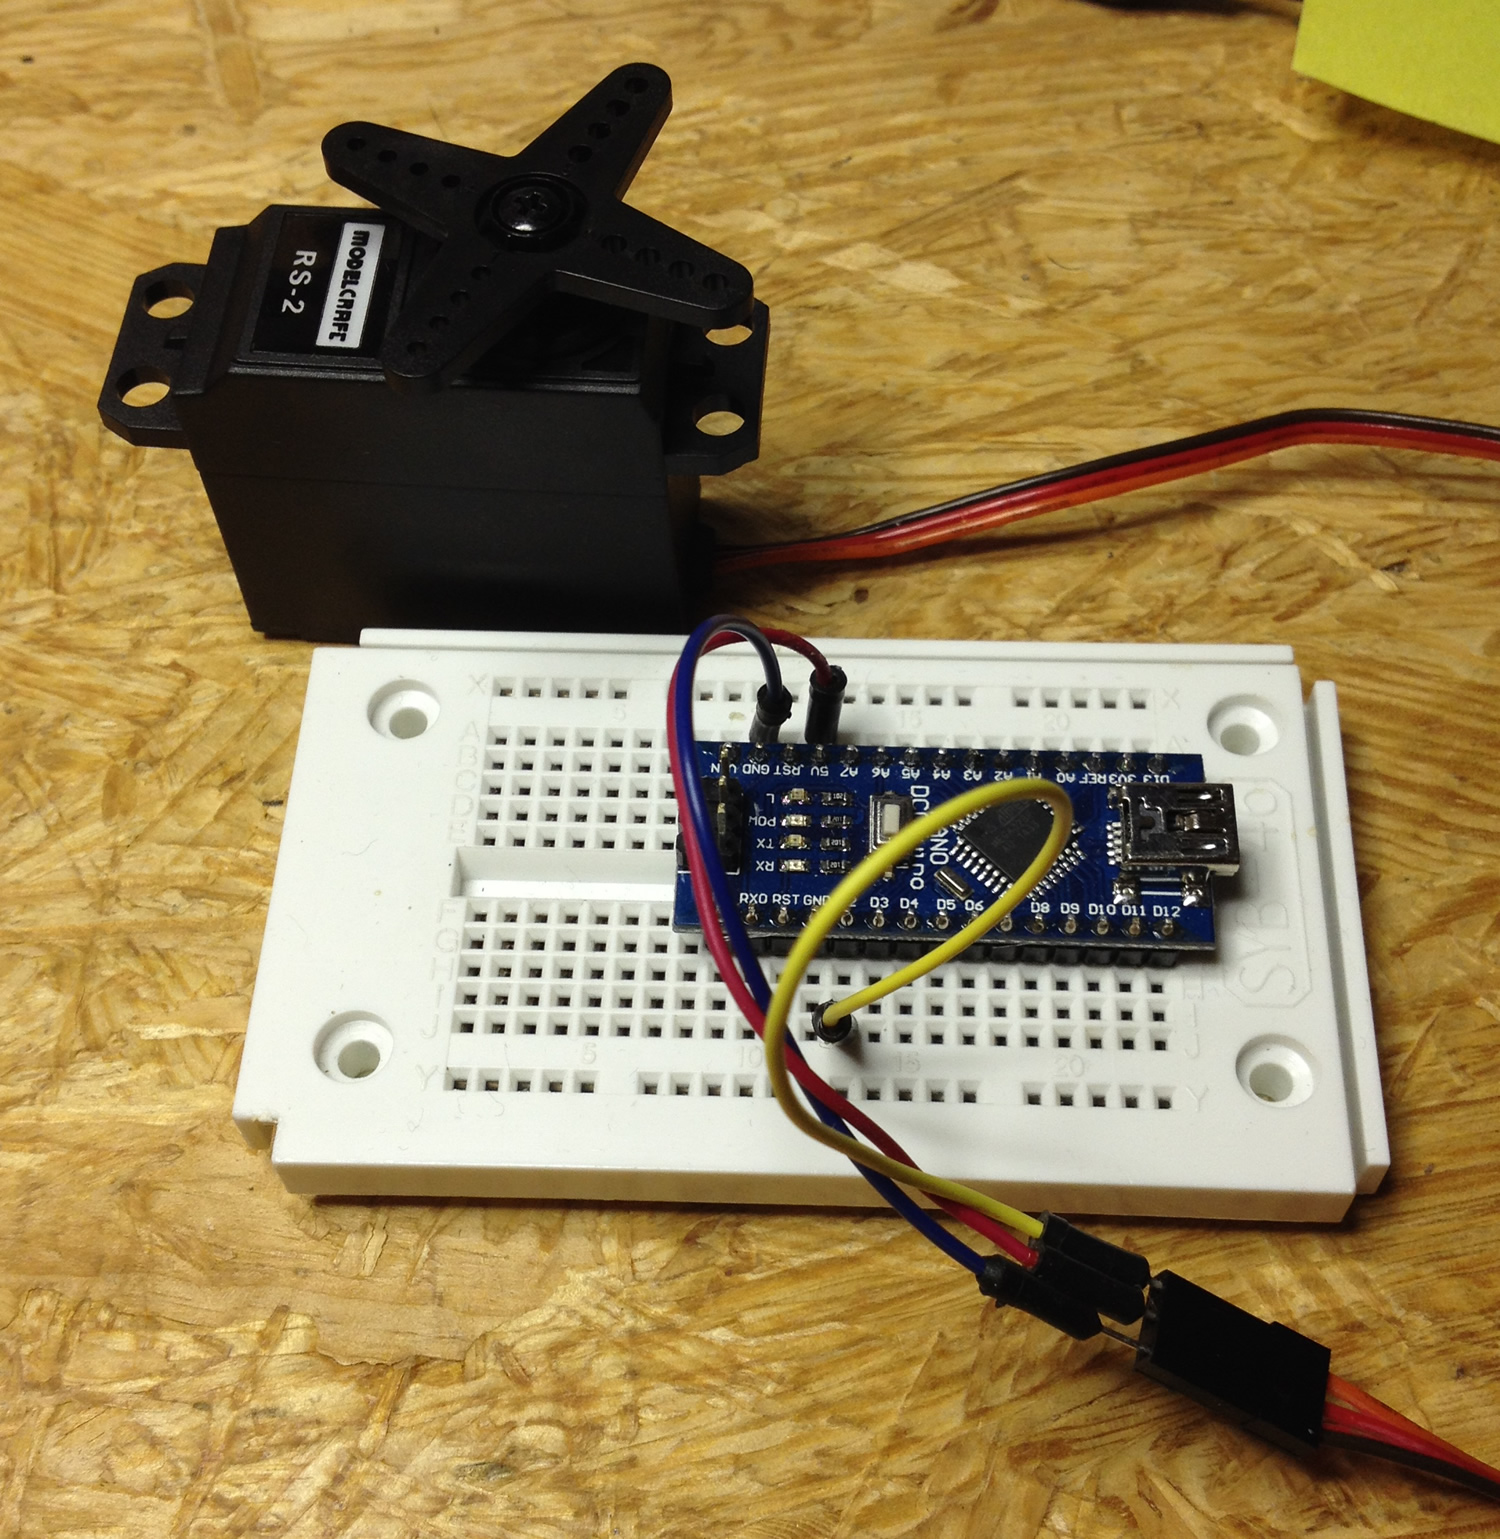
Servo motors are controlled by sending a PWM (pulse-width modulation) signal to the signal line of the servo. The width of the pulses determines the position of the output shaft. When you send the servo a signal with a pulse width of 1.5 milliseconds (ms), the servo will move to the neutral position (90 degrees).
Arduino Projekte Servo ansteuern YouTube
Ich möchte gerne einen Servo (Digitales Segelwindservo RS-10 von Conrad : Betriebsspannung: 4,8- 7,2 V, max. Laufweg 5 x 360 Grad) mit dem Arduino so ansteuern, dass er sich um 180 Grad dreht und eine Pause einlegt. Meine Fragen sind jetzt nun: Brauche ich einen zusätzlichen Motortreiber und wenn ja welchen?
Arduino & Servo So funktioniert's!
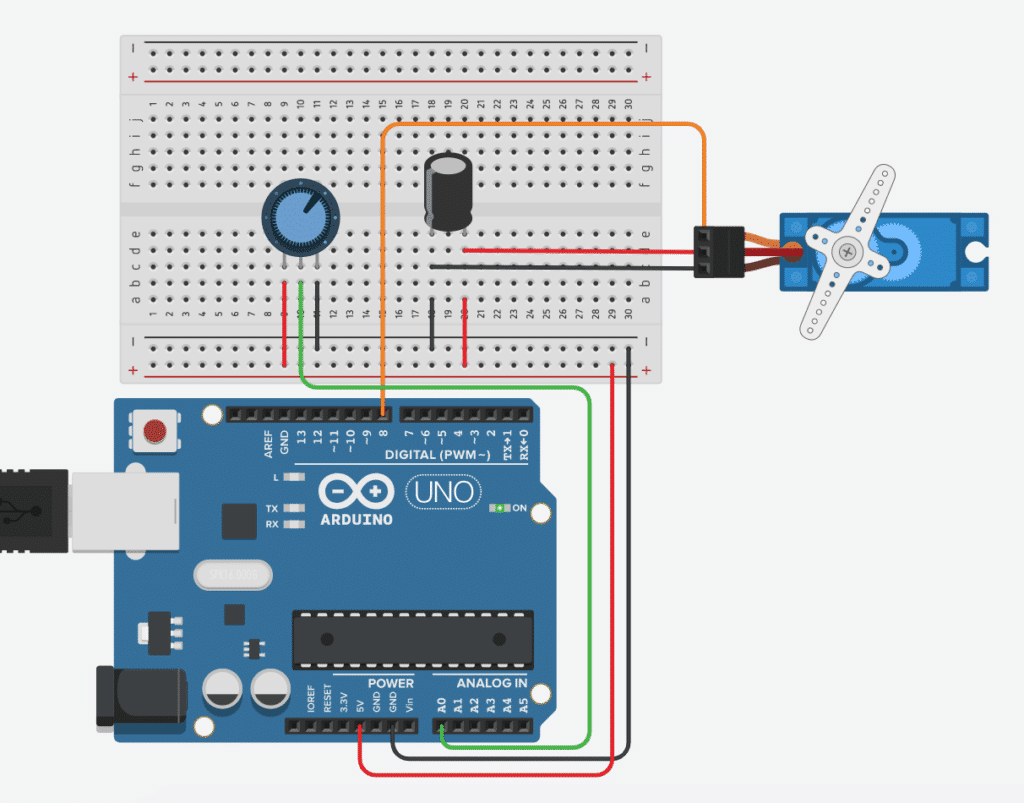
In diesem Video geht es darum, wie man einen Servomotor mit einem Arduino ansteuern kann. Dabei wird auch noch ein Potentiometer verwendet. Show more

Arduino Projekt Servomotor Ansteuerung mit dem Arduino und einem Multi Function Shield YouTube
Funktionsweise, Anschluss und Ansteuerung eines Servomotors, wie er im Modellbau verwendet wird. Einfach und nachvollziehbar für Einsteiger erklärt.Dieses Pr.

Servo ansteuern mit Arduino, ESP8266, EPS32 YouTube
is a great library for controlling servo motors. In this article, you will find two easy examples that can be used by any Arduino board. The first example controls the position of an RC (hobby) with your Arduino and a potentiometer. The second example sweeps the shaft of an RC servo motor back and forth across 180 degrees.
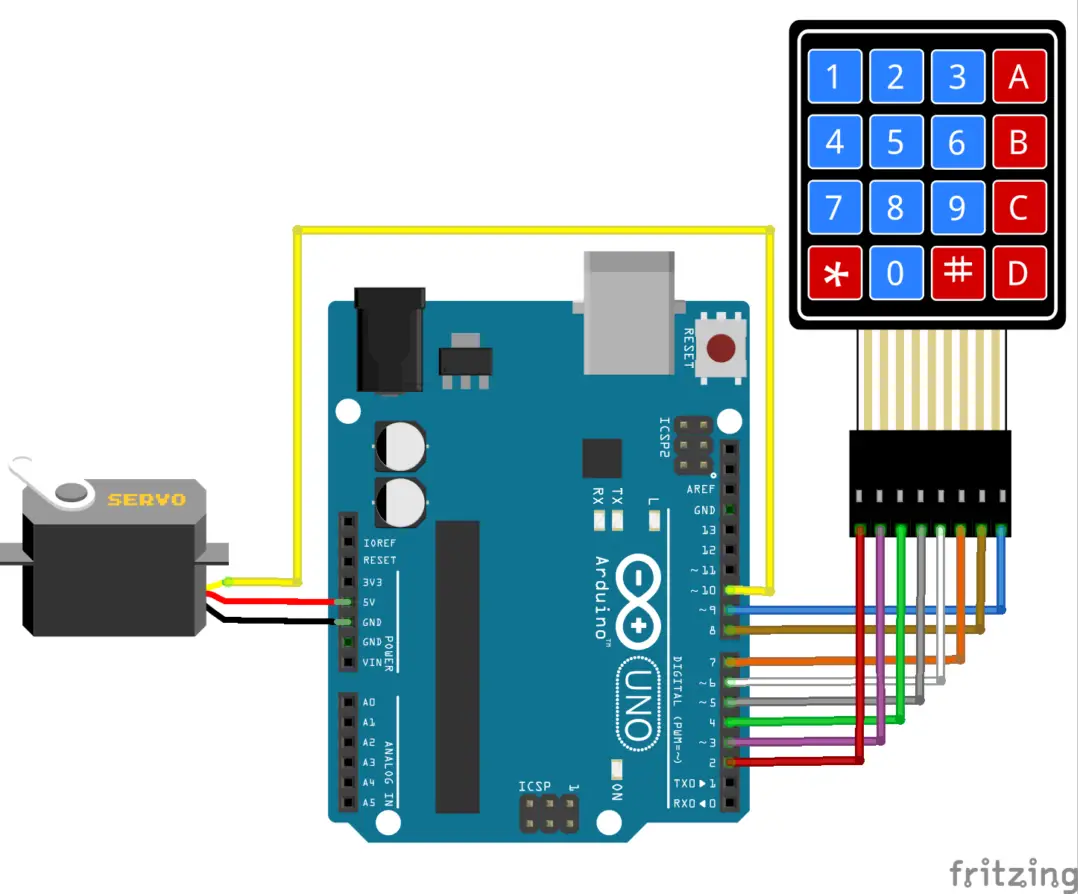
Servo control using Keypad Arduino code & circuit
How servo motor works How to program Arduino to control servo motor How to program Arduino to control the speed of servo motor How to provide the extra power for high-torque servo motors. Hardware Required Or you can buy the following sensor kit: 1 × DIYables Sensor Kit 30 types, 69 units Please note: These are Amazon affiliate links.

How to control 3 servo motors using push button switches and an arduino uno Artofit
Step 1: Tutorial Hobby servos are the easiest way to get going with motor control. They have a 3-pin 0.1" female header connection with +5V, ground and signal inputs. The motor shield simply brings out the PWM output lines from Arduino pins 9 and 10 to two 3-pin headers so that its easy to plug in and go.

Servomotoren mit dem Arduino ansteuern Arduino Tutorial YouTube
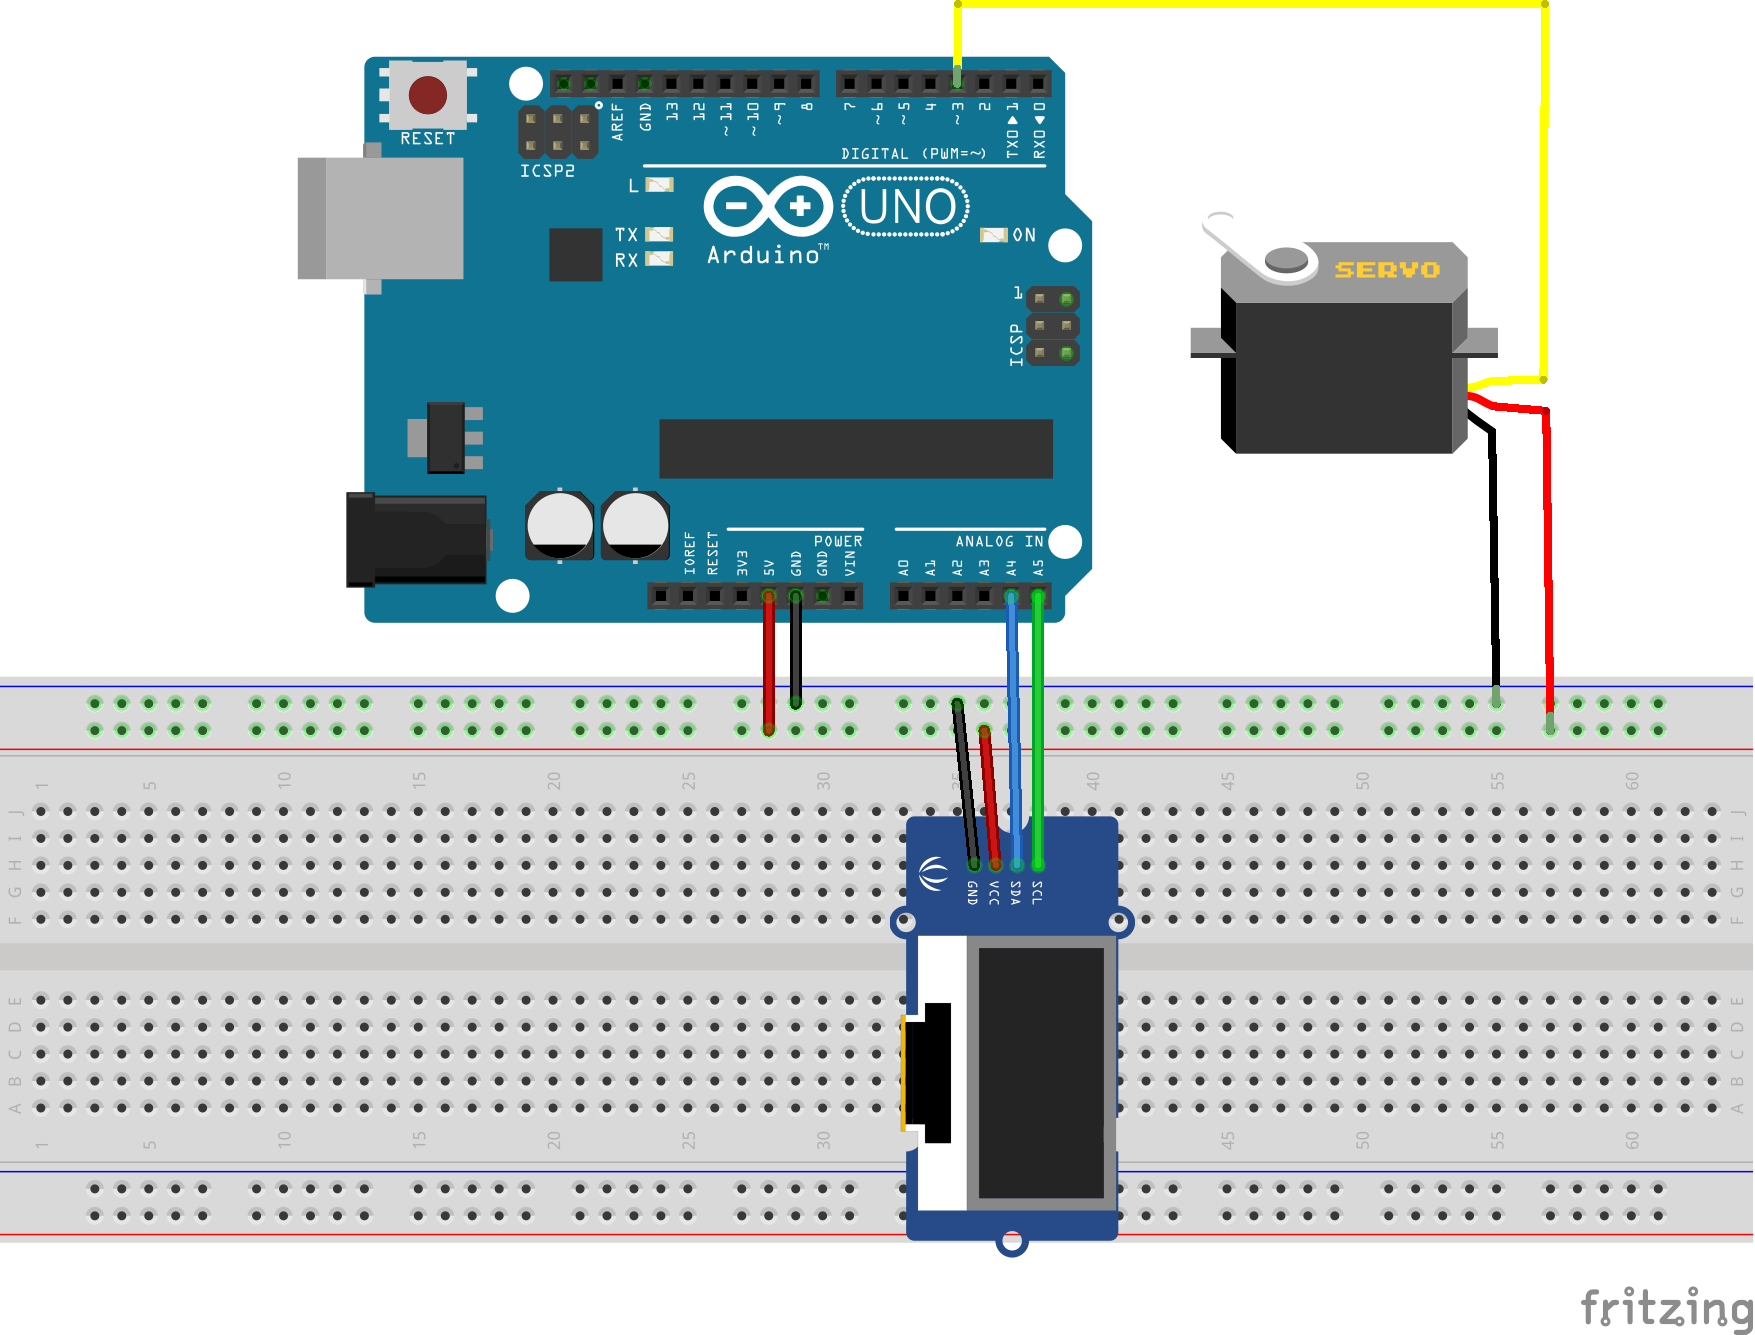
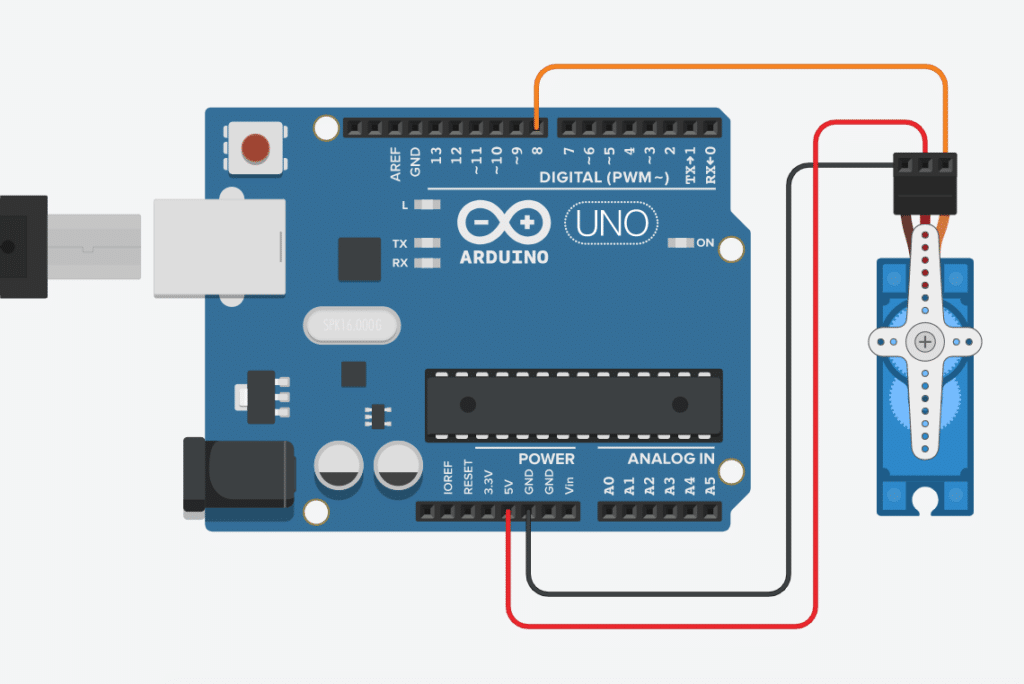
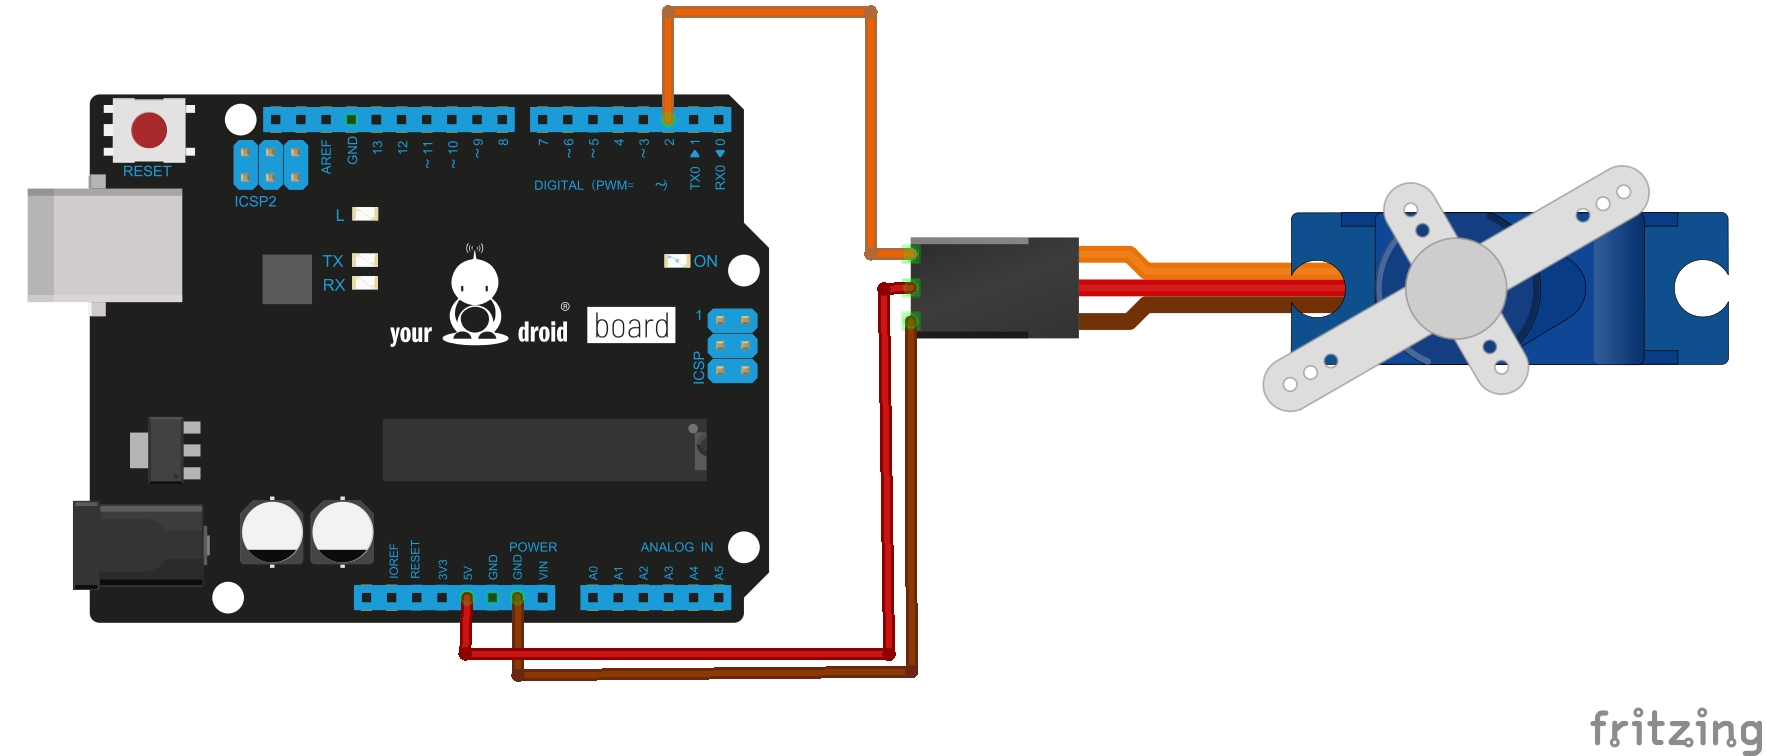
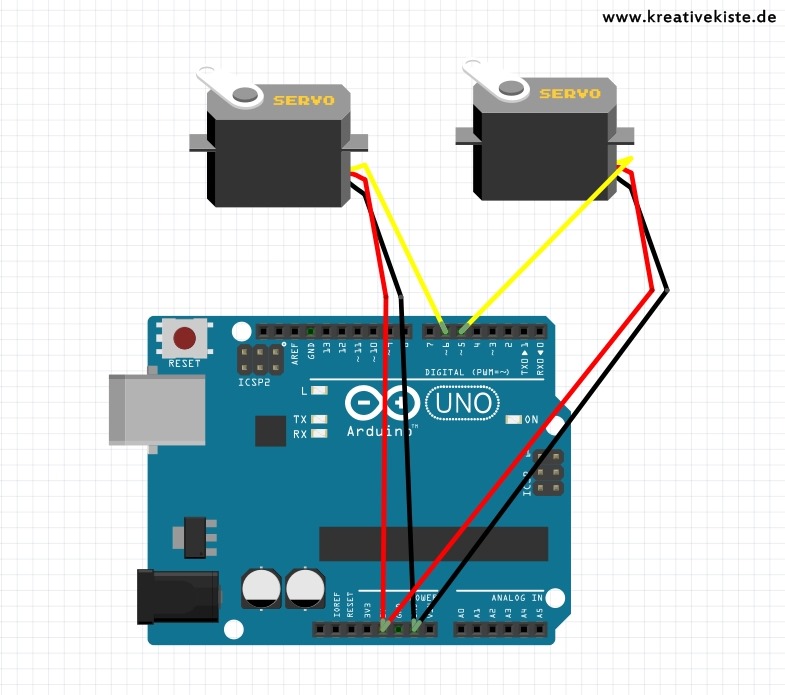
The connections for servo motors with Arduino are as follows: Connect the black wire on both the servo motors with the GND on the Arduino Connect the red wire on both the servo motors with the 5V pin on the Arduino Connect the yellow wire on the first motor with pin 8 on the Arduino
Arduino & Servo So funktioniert's!
The tutorial includes two main parts: Button controls servo motor without debouncing. Button controls servo motor with debouncing. Hardware Required Or you can buy the following sensor kit: 1 × DIYables Sensor Kit 30 types, 69 units Please note: These are Amazon affiliate links.
Servomotor mit Arduino ansteuern Anleitung RoboterBausatz.de
Servo Device Control Allows Arduino boards to control a variety of servo motors. This library can control a great number of servos. It makes careful use of timers: the library can control 12 servos using only 1 timer. On the Arduino Due you can control up to 60 servos. Go to repository Compatibility
Tutorial Servomotor
In this project, you can learn how to control servo motor using serial monitor. Nov 14, 2018 • 73533 views • 28 respects. serial monitor. serial. motor. monitor. servo. servo motor. Components and supplies. 1. Male/Male Jumper Wires. 1. Arduino UNO. 1. Servo Module (Generic) Apps and platforms. 1. Arduino IDE. Project description. Code. Code.

Nr.13 Servo ansteuern Funduino Kits und Anleitungen für Arduino Raspberry Pi, Kit
In this tutorial, we will learn how to control a standard servo motor, to go back and forth across 180 degrees, using a. for loop() . This is done with the help of the Servo library, which is pre-installed library in the Arduino IDE (both offline and online versions). Note: This tutorial uses an Arduino UNO, but you can use any official Arduino.

Arduino Servo ansteuern Schaltplan und Sketch » IoTspace.dev
Im Teil 4 der Arduino Reihe steuern wir einen Servolenkung an. Zwei verschiedene Stellungen mit 2 Tastern.Mehr Infos: https://domsmoba.de/arduino/
Servo mit Arduino ansteuern
Step 2: Parts. For this tutorial, we'll need the following parts: Continuous Rotation Servo Motor: Digi-Key link. 100 nF ceramic capacitor: Digi-Key link. 1 uF electrolytic capacitor: Digi-Key link. 5V LDO voltage regulator: Digi-Key link. DC Power Adapter: Digi-key link. 12V Wall Power Adapter: Digi-key link. Arduino UNO: Digi-key link.
Servo Ansteuerung direkt vom Arduino Shelvin Elektronik ausprobiert und erläutert
Connect Arduino to PC via USB cable. Open Arduino IDE, select the right board and port. Copy the above code and open with Arduino IDE. Click Upload button on Arduino IDE to upload code to Arduino. Open Serial Monitor. Push the joystick in some direction. See the servo motor's rotation. See the result on Serial Monitor. COM6.